|

|
|

| Topic review | ||
|
|
|
|
http://www.cranbury.info/viewtopic.php?t=5644
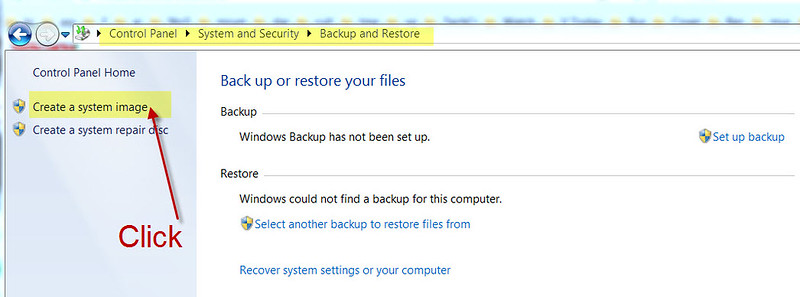
2. Go to "Control Panel" and click "System and Security"
3. Click "Backup and Restore"

4. Click "Create a system image"
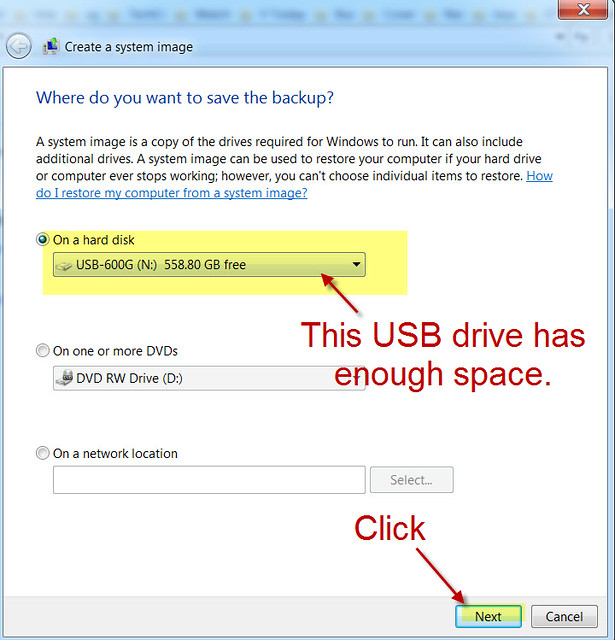
5. Select a hard drive for saving the backup image; make sure the hard drive or USB drive has enough free space.
6. Back up your system drive (usually the C drive) and click "Next"
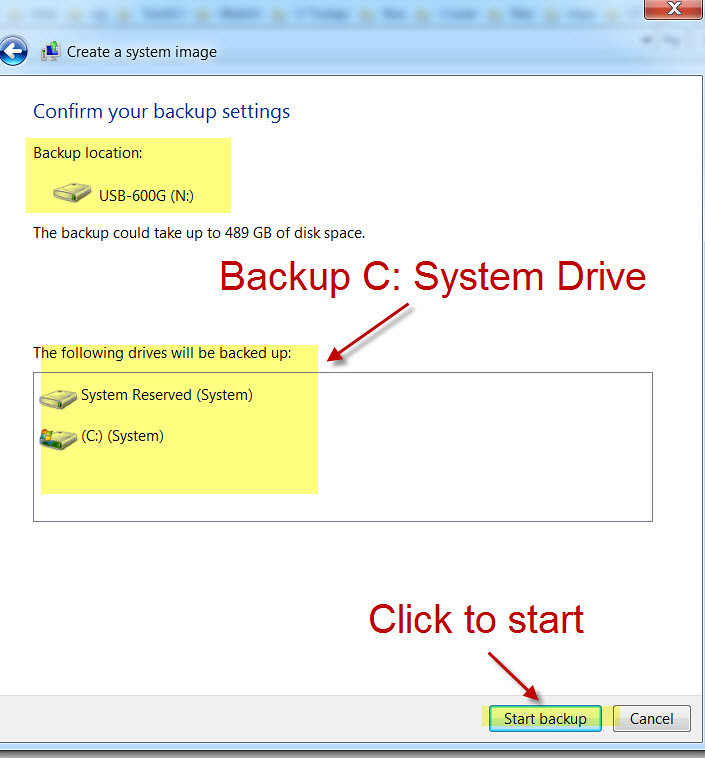
7. Wait for the backup process to complete (it took more than 3 hours to back up my C drive, which has about 500 GB of data).
8. At the end, it will ask you if you want to create a "Repair Disc." You need a blank DVD+R/-R disc for creating the repair disc.
It's a good idea to create a repair DVD disc, in case your PC crashes and won't boot up; the repair DVD disc can boot the PC up for repair.
Note: The backup task creates a WindowsImageBackup folder on the target hard drive or USB drive. The content of the folder is not readable.